


Product Details
Product Details
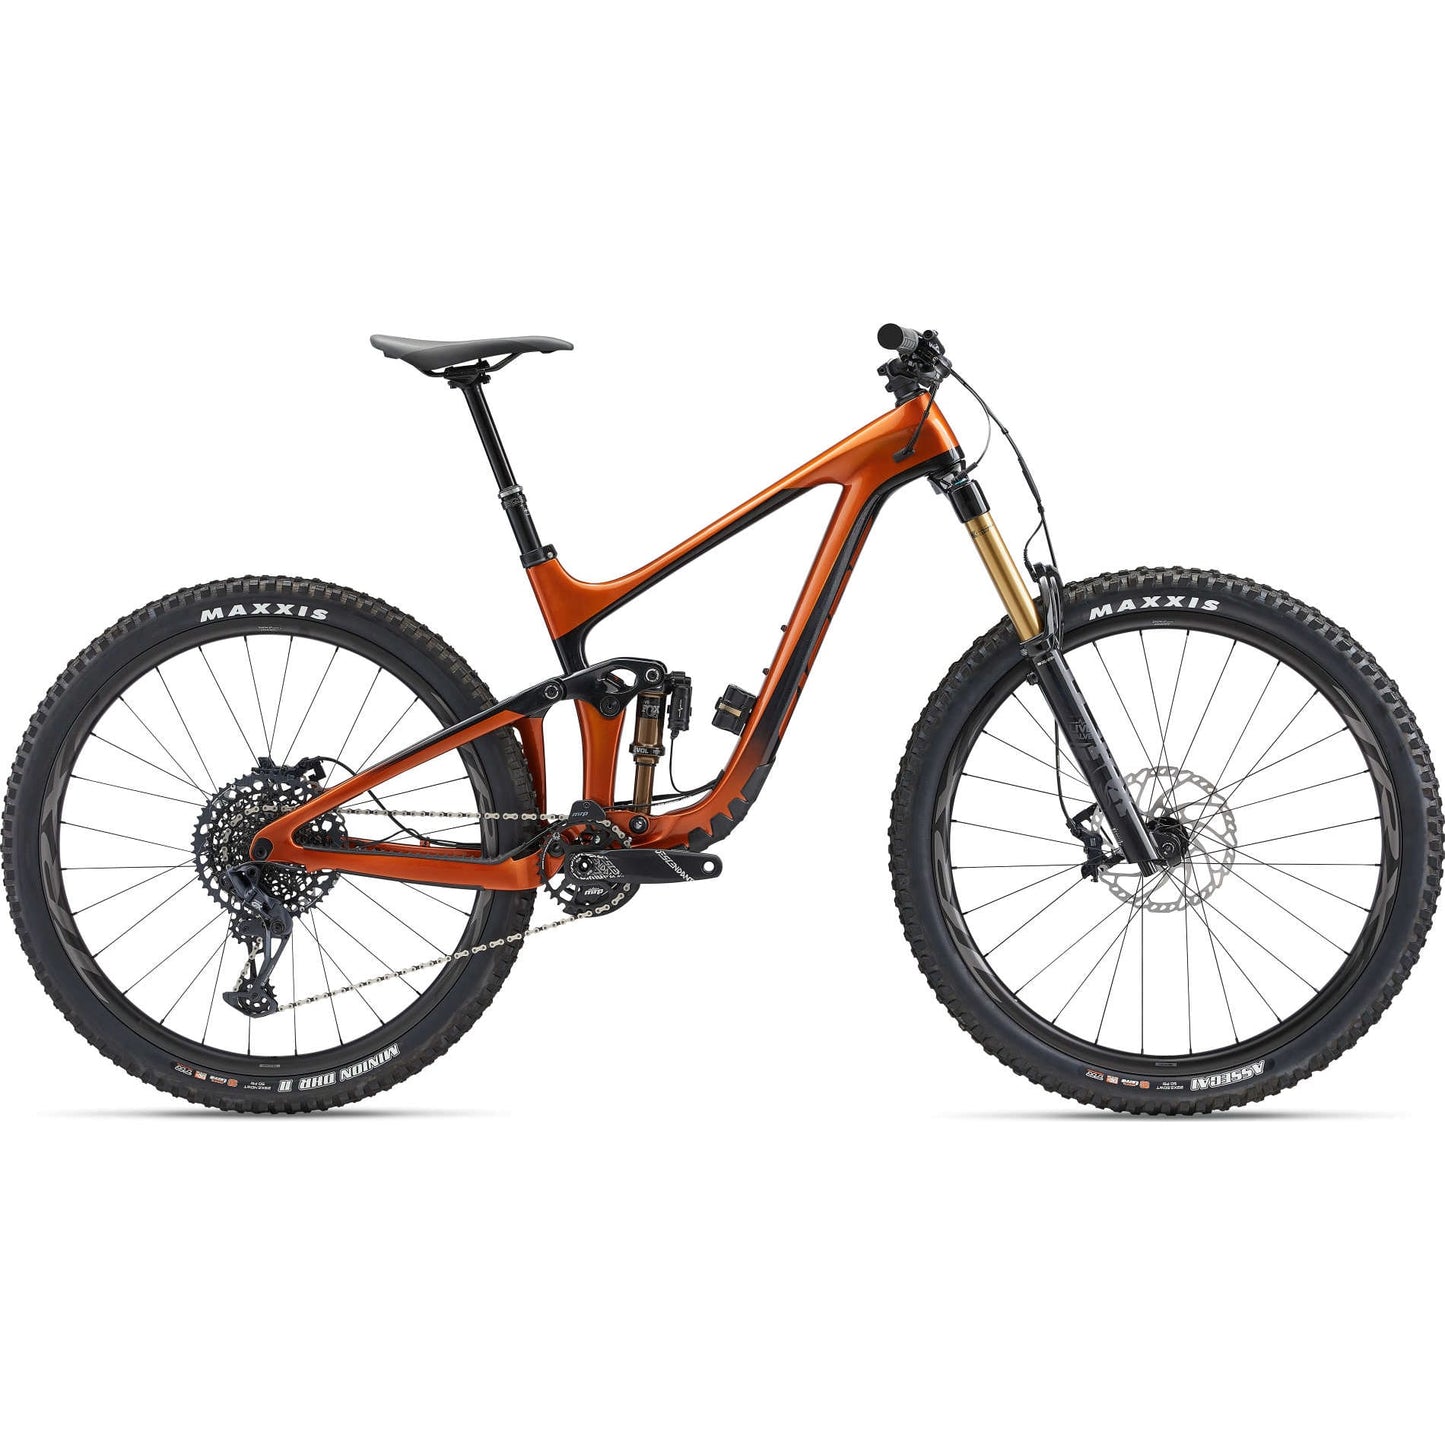
STAY COOL WHEN THE TRAIL GETS ROWDY. FROM BIG CLIMBS TO STEEP, ROCKY DESCENTS, THIS FULL-COMPOSITE RIPPER WAS DESIGNED WITH GIANT ENDURO PROS FOR HARD-CHARGING CONFIDENCE AND CONTROL.
Features
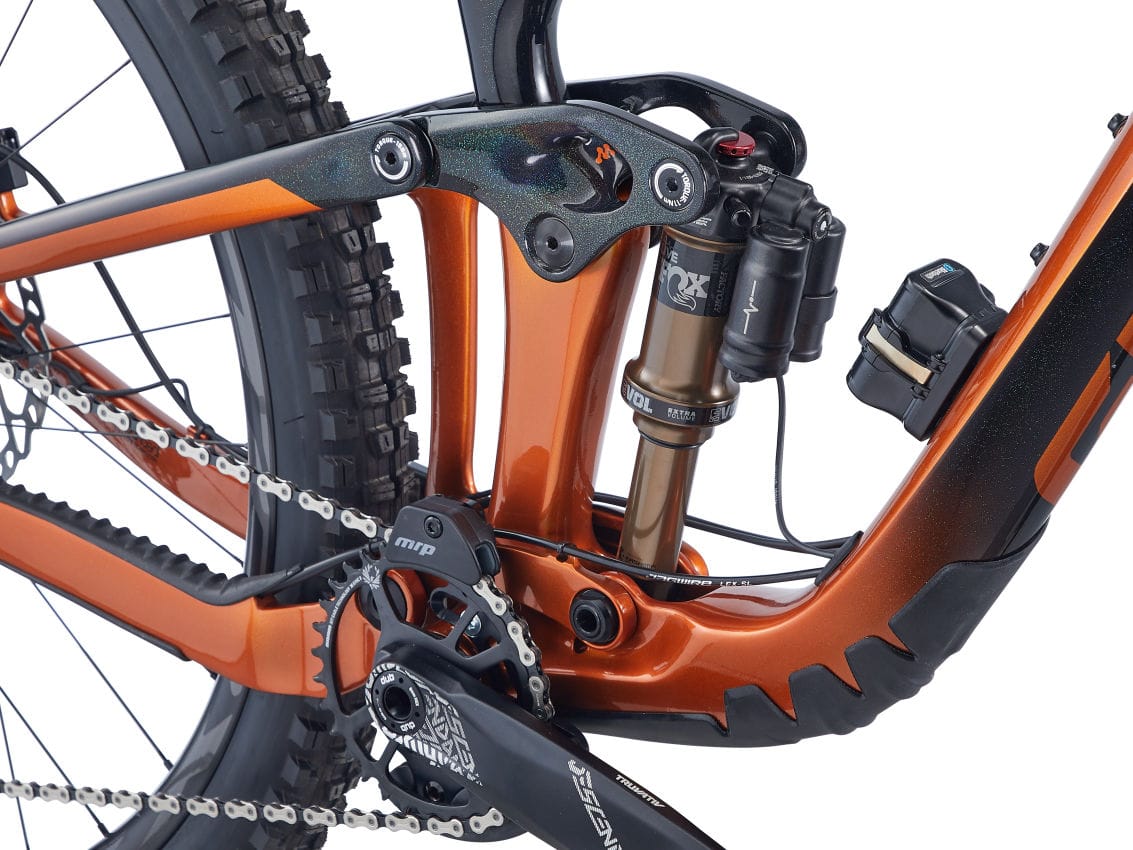
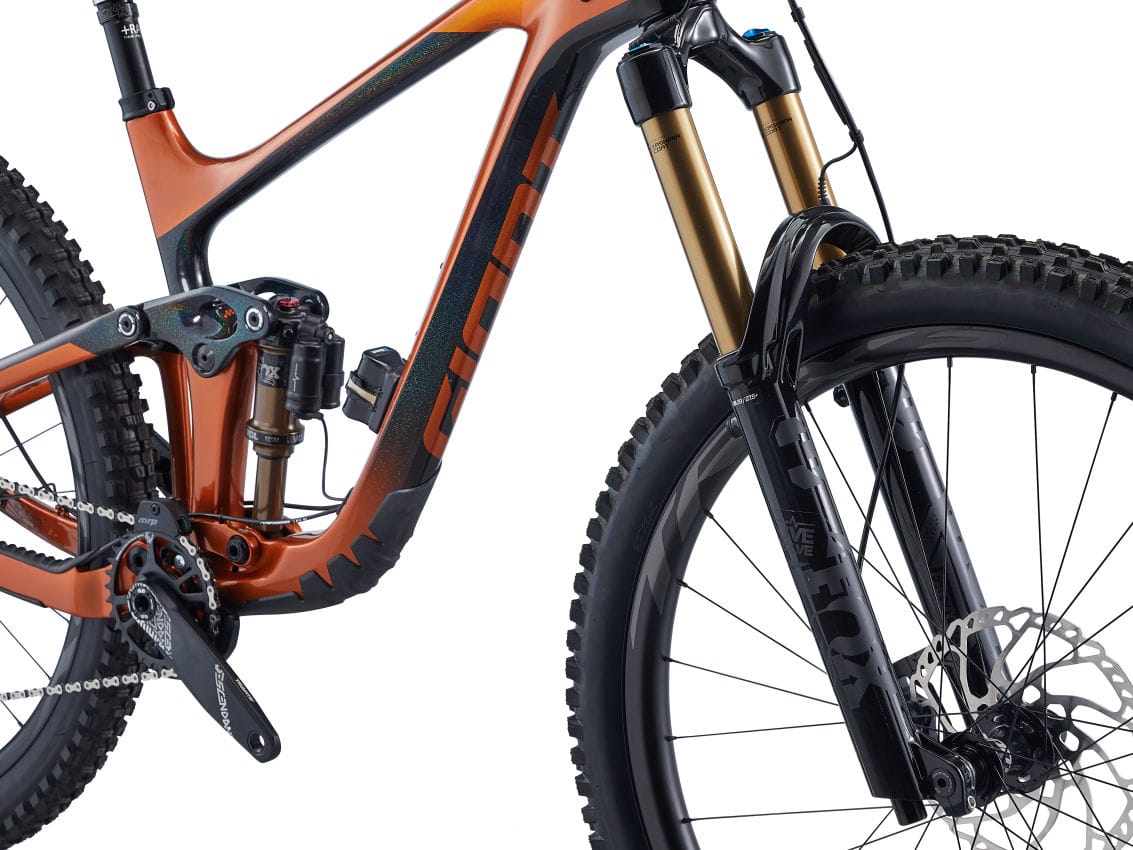
- Race-bred suspension: Maestro rear suspension developed and tested under extreme conditions of Enduro World Series races. The trunnion mount shock has a longer stroke and smoother feel, and the Advanced Forged Composite upper rocker arm adds stiffness while lowering overall frame weight.
- Progressive enduro geometry: The purpose-built composite frameset helps you ride aggressive descents and rail corners with confidence. Enduro-optimized head and seattube angles, plus a 170mm fork with 44mm offset, produce confident front-end handling.
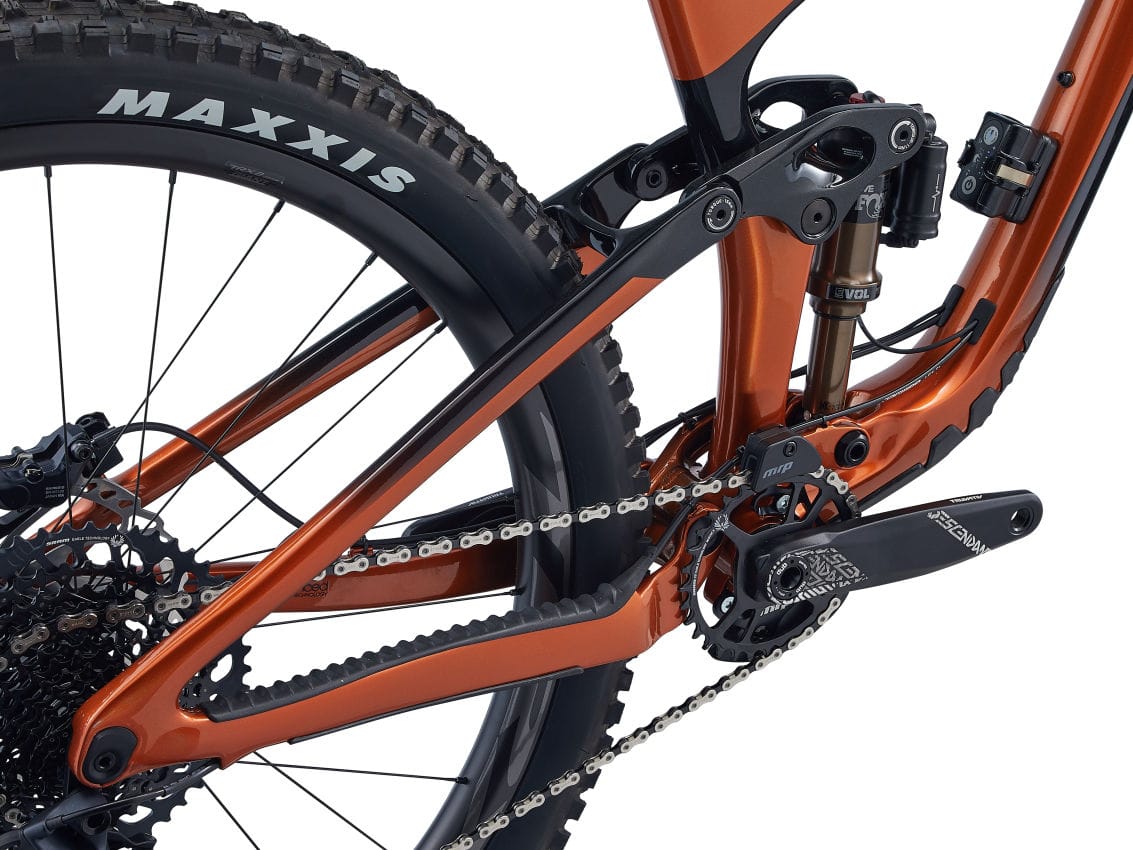
- 29er confidence and control: Larger 29-inch diameter wheels optimized to roll over rugged enduro terrain with improved balance and stability, giving you the momentum to crank up tough climbs and the confidence to fly on fast, technical descents.
- Frame: Advanced-Grade Composite front and rear triangles, 146mm Maestro suspension, 12x148mm thru-axle
- Fork: Fox 38 Factory Live Valve, 170mm, FIT4 damper, 15x110 Kabolt X, 44mm offset, custom tuned for Giant
- Rear Shock: Fox Factory Live Valve, 205/60, custom tuned for Giant
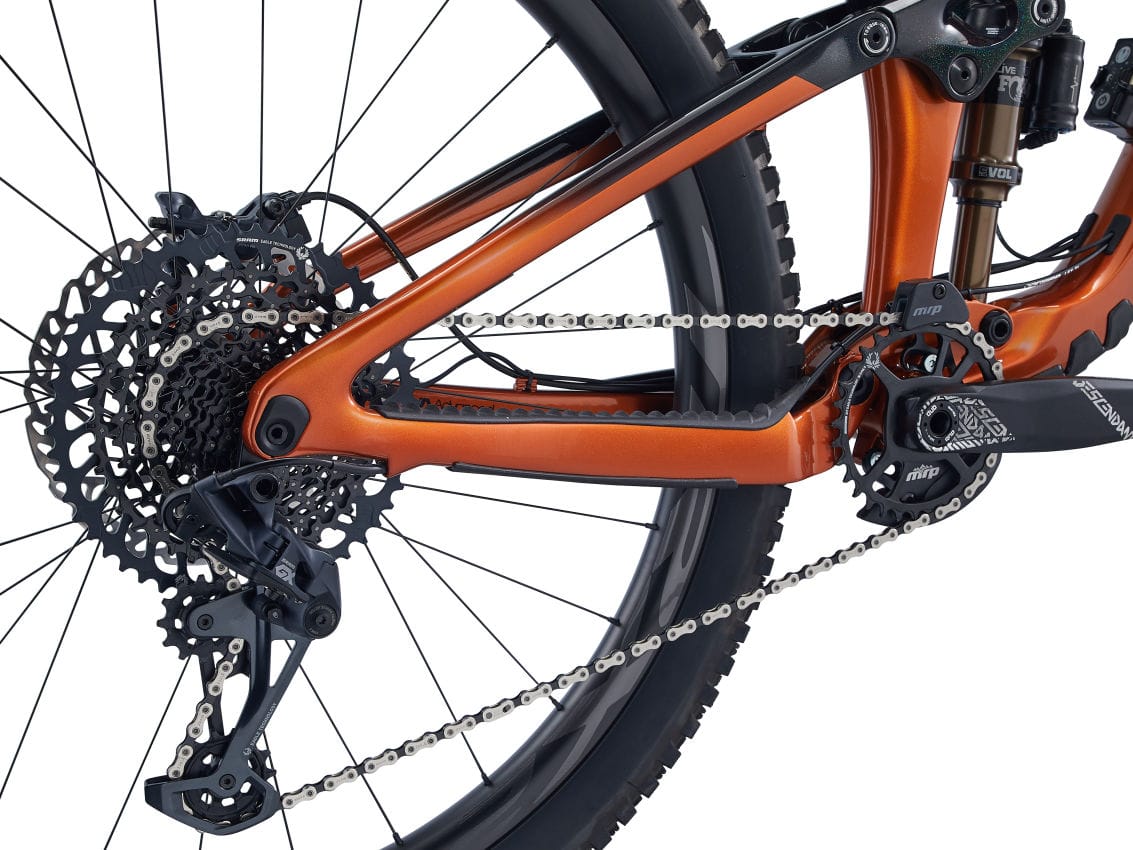
- Gear Shifters: SRAM GX Eagle, 1x12
- Chainset: TruVativ Descendent 6k, DUB, 32t S:165mm, M:170mm, L:170mm, XL:170mm
- Rear Cassette: SRAM NX Eagle, 11x50
- Chain: SRAM GX Eagle
- Front Derailleur: NA
- Rear Derailleur: SRAM GX Eagle
- Bottom Bracket: SRAM DUB, press fit
- Pedals: Not included
- Rims: Giant TRX 2 29 WheelSystem, 30mm inner width
- Front Hub: Giant TRX 2 29 WheelSystem
- Rear Hub: Giant TRX 2 29 WheelSystem
- Front Tyre: Maxxis Assegai 29x2.5 WT, 3C MaxxTerra, EXO+, TR
- Rear Tyre: Maxxis Minion DHR II 29x2.4 WT, 3C MaxxTerra , EXO+, TR tubeless
- Brakes: Shimano SLX BR-M7120, hydraulic, Shimano RT-66 rotors [F]203mm, [R]203mm
- Handlebars: Giant Contact SLR TR35, composite, 800x35mm, 20mm rise
- Grips: Giant Tactal Pro Single S:120mm, M:120mm, L:130mm, XL:130mm
- Stem: Giant Contact SL 35 S:40mm, M:40mm, L:40mm, XL:40mm
- Saddle: Giant Romero SL
- Seatpost: TranzX travel-adjustable dropper, remote S: 120-150mm travel / 30.9 x 459mm M: 140-170mm travel / 30.9 x 499mm L: 170-200mm travel / 30.9 x 525mm XL: 170-200mm travel / 30.9 x 525mm
- Extras: Factory set up tubeless, 2.5" max tyre size, 36t max chainring size, MRP AMG CS chain guide, 3M tailgate protector
- Weight: N/A
The geometry of the Advanced composite frame and swingarm was developed specifically around 29-inch wheels. That means shorter chainstays, a longer toptube, and just the right angles with the headtube (64.56 degrees) and seattube (76.36 degrees). We gave it an updated Maestro rear suspension system with 146mm of travel. The trunnion mount shock and Advanced Forged Composite rocker arm deliver an active, super plush feel on the trail.
We reserve the right to make changes to the product information contained on this site at any time without notice, including with respect to equipment, specifications, models, colours, materials and pricing. Due to supply chain issues, compatible parts may be substituted at any time without notice.
Bike and frame weights are based on pre-production painted frames at time of publication. Weights may vary in final production.
How to Build Your Bike
How to Build Your Bike
Aftercare
Aftercare
You Might Be Interested In
GIANT REIGN ADVANCED PRO 29 1 MTB BIKE 2023 - AMBER GLOW/RAINBOW BLACK
SKU: 2211038104
EPOS Code:
Product Description
Product Description
STAY COOL WHEN THE TRAIL GETS ROWDY. FROM BIG CLIMBS TO STEEP, ROCKY DESCENTS, THIS FULL-COMPOSITE RIPPER WAS DESIGNED WITH GIANT ENDURO PROS FOR HARD-CHARGING CONFIDENCE AND CONTROL.
Features
- Race-bred suspension: Maestro rear suspension developed and tested under extreme conditions of Enduro World Series races. The trunnion mount shock has a longer stroke and smoother feel, and the Advanced Forged Composite upper rocker arm adds stiffness while lowering overall frame weight.
- Progressive enduro geometry: The purpose-built composite frameset helps you ride aggressive descents and rail corners with confidence. Enduro-optimized head and seattube angles, plus a 170mm fork with 44mm offset, produce confident front-end handling.
- 29er confidence and control: Larger 29-inch diameter wheels optimized to roll over rugged enduro terrain with improved balance and stability, giving you the momentum to crank up tough climbs and the confidence to fly on fast, technical descents.
- Frame: Advanced-Grade Composite front and rear triangles, 146mm Maestro suspension, 12x148mm thru-axle
- Fork: Fox 38 Factory Live Valve, 170mm, FIT4 damper, 15x110 Kabolt X, 44mm offset, custom tuned for Giant
- Rear Shock: Fox Factory Live Valve, 205/60, custom tuned for Giant
- Gear Shifters: SRAM GX Eagle, 1x12
- Chainset: TruVativ Descendent 6k, DUB, 32t S:165mm, M:170mm, L:170mm, XL:170mm
- Rear Cassette: SRAM NX Eagle, 11x50
- Chain: SRAM GX Eagle
- Front Derailleur: NA
- Rear Derailleur: SRAM GX Eagle
- Bottom Bracket: SRAM DUB, press fit
- Pedals: Not included
- Rims: Giant TRX 2 29 WheelSystem, 30mm inner width
- Front Hub: Giant TRX 2 29 WheelSystem
- Rear Hub: Giant TRX 2 29 WheelSystem
- Front Tyre: Maxxis Assegai 29x2.5 WT, 3C MaxxTerra, EXO+, TR
- Rear Tyre: Maxxis Minion DHR II 29x2.4 WT, 3C MaxxTerra , EXO+, TR tubeless
- Brakes: Shimano SLX BR-M7120, hydraulic, Shimano RT-66 rotors [F]203mm, [R]203mm
- Handlebars: Giant Contact SLR TR35, composite, 800x35mm, 20mm rise
- Grips: Giant Tactal Pro Single S:120mm, M:120mm, L:130mm, XL:130mm
- Stem: Giant Contact SL 35 S:40mm, M:40mm, L:40mm, XL:40mm
- Saddle: Giant Romero SL
- Seatpost: TranzX travel-adjustable dropper, remote S: 120-150mm travel / 30.9 x 459mm M: 140-170mm travel / 30.9 x 499mm L: 170-200mm travel / 30.9 x 525mm XL: 170-200mm travel / 30.9 x 525mm
- Extras: Factory set up tubeless, 2.5" max tyre size, 36t max chainring size, MRP AMG CS chain guide, 3M tailgate protector
- Weight: N/A
The geometry of the Advanced composite frame and swingarm was developed specifically around 29-inch wheels. That means shorter chainstays, a longer toptube, and just the right angles with the headtube (64.56 degrees) and seattube (76.36 degrees). We gave it an updated Maestro rear suspension system with 146mm of travel. The trunnion mount shock and Advanced Forged Composite rocker arm deliver an active, super plush feel on the trail.
We reserve the right to make changes to the product information contained on this site at any time without notice, including with respect to equipment, specifications, models, colours, materials and pricing. Due to supply chain issues, compatible parts may be substituted at any time without notice.
Bike and frame weights are based on pre-production painted frames at time of publication. Weights may vary in final production.
How to Build Your Bike
How to Build Your Bike
Aftercare
Aftercare
You Might Be Interested In